
Remote Technology FAQ
For tips on how to stay secure while using Zoom, go to Secure Zoom Meetings and Webinars.
Preparing to Teach with Zoom
How can I make sure my Zoom account is ready to use for teaching?
To stay secure while using Zoom, please view this video tutorial Zoom Security Settings for Meetings Scheduled in Canvas.
For additional information about Zoom security, please visit Secure Zoom Meetings and Webinars.
If you still need to claim your Zoom account, please visit Web Conferencing.
How do I access my Zoom account? Where can I go with questions about Zoom or to access Zoom resources?
Zoom accounts have been set up for all instructors of record. Some instructors may not have previously used this platform and will need training. For resources on using Zoom and Canvas, please see the Teaching Remotely training page or IT Services’ web conferencing resources.
Please register for Remote Teaching Training soon. Additionally, you may review general Zoom training videos and tutorials.
For individual support on setting up your remote teaching, please complete this brief Contact Us form.
Updated: November 30, 2020
How can I tell if my internet connection is fast enough to use Zoom?
You may test your internet connectivity to ensure you will be able to use Zoom effectively. Zoom requires a modest amount of bandwidth, but we have found that you should have a minimum speed of 1.5Mbps—and the experience will be best if you have over 5Mbps.
Check Your Internet Speed
You can check your internet speed by going to Google.com and searching “internet speed test”. Your first search result will be the test. Click or tap Run Speed Test and it will test your download and upload speeds.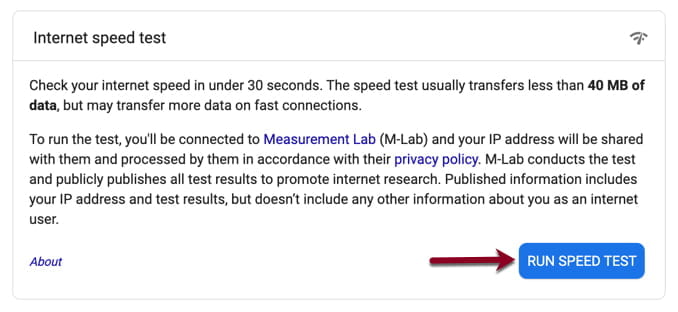
If your Internet download speed is below 20 megabits per second, there is a high likelihood your video will be difficult to view and you may have audio issues. In this case, first try to eliminate other demands on your Internet connection, such as streaming movies at the same time on a different device in the residence. If your speed still does not improve, please consider contacting your Internet provider to inquire about improving your bandwidth, or your mobile phone provider about the possibility of purchasing a “hot spot” for high speed cellular Internet access.
Please note, if you have many people or devices in your home using Wi-Fi, it may be helpful to obtain an Ethernet cable and connect your computer to the router with the Ethernet cable to teach your Zoom classes.
What are the system requirements for using Zoom?
Are Zoom meetings real time?
How do I enable Zoom in Canvas?
For Canvas courses created on or after March 23, 2020, a link called “Zoom – The University of Chicago Main Account*” will appear in your course navigation. If you created your course prior to March 23rd, you will need to adjust your course navigation to add the Zoom integration so it is usable in the course. For instructions on customizing your navigation, please see Customizing Your Course Navigation Menu.
*Please note that there are several different Zoom sub-accounts integrated into Canvas. For Graham School instructors, please check with your department for the correct Zoom to add to your navigation. Chicago Booth instructors, you will need to add “Zoom – UChicago Booth” to your course navigation. Some instructors in the BSD may need to use the UChicago Medicine sub-account integration.
Where can I get more help?
Zoom Help Center has excellent “how to” articles and videos. You can also submit a request online to Zoom; chat live with Zoom’s support team by visiting your account in the web portal and selecting “help” in the lower right hand corner; or call from anywhere in the US: +1.888.799.9666 ext 2. See the ITS Web Conferencing Resources website for general Zoom FAQs, as well.
For account questions, please contact IT Services, or visit IT Services’ web conferencing resources page.
Recommended Meeting and Security Settings
What is the University doing to address the issues in the media about Zoom security (e.g., unintended participants disrupting meetings and security of the Zoom tools)?
In response to Zoom conferencing incidents within our community and at other higher education institutions, the University is taking additional steps to ensure a safe and productive online environment for instructors and students. More information is available on the Web Conferencing web site about Zoom Privacy and Security. Zoom has been updated for the University to enable additional security features.
Instructors can now:
- Require students to log in to Zoom to attend a class session. This blocks attendees from outside the University of Chicago and improves course security.
- Remove attendees who are not supposed to be in the session.
- Prevent meeting attendees from sharing their screens without permission.
- Limit access to meeting recordings to members of the University community.
The IT Services web conferencing website includes a section on these and other security settings in Recommended Instructor Settings for Zoom Classes. The website also includes information on how to Manage Participants During a Zoom Meeting that will be helpful for instructors, teaching assistants, and others.
How can I add the security option to allow authenticated users only to my Zoom class meetings in Canvas?
You may add the “authenticated users only” option within the Canvas-Zoom integration.
For new meetings:
- In your Canvas course site, click on the Zoom navigation item to go to the Zoom page.
- At the top of the page, click the Schedule a New Meeting button.
- Enter the information about your meeting date, time, recurrence, and settings (see the FAQ below for “What are the recommended settings for class meetings?”)
- In Meeting Options, be sure to check Only authenticated users can join.
- Hit the Save button.
For existing meetings:
- In your Canvas course site, click on the Zoom navigation item to go to the Zoom page.
- Click on the Meeting Topic in your Upcoming Meetings tab.
- On the Meeting Details page, scroll down to the bottom and click, Edit this Meeting.
- Scroll down to Meeting Options and check Only authenticated users can join.
- Click the Save button to complete the change.
This setting adds the authenticated users only option to your class meetings.
What are the recommended settings for class meetings?
Recommended settings for Zoom synchronous Class Meetings (see additional security recommendations):
- Topic: Append the words “class meeting” to the name of your course. If you teach in a course with multiple sections, include your name for easy identification by the students.
- When: Select a date and time for your online session. It should be the same time as the first time your class meets.
- Duration: Set the duration of your class.
- Time Zone: Leave as Central Time (Default).
- Recurring Meeting: Select the Recurring meeting checkbox and set recurring frequency.
- Registration: Leave unchecked.
- Video: Off for both Host and Participant.
- Audio: Both.
- Meeting Options:
- Require meeting password: Checked by default, this is to secure your new class meetings with an automatically generated 6-digit numeric password. If you previously had set up your meetings and communicated the meeting password, your original settings are kept. If you are scheduling new meetings, or editing meetings previously scheduled without a password, it is recommended that you enter a strong password (make your password 10 characters long and use at least three of the following types of characters: lowercase letters, uppercase letters, numbers, symbols) in lieu of the generated numeric password. By default, the meeting password is embedded in the meeting link and it is meant to prevent “bad actors” from gaining access to a meeting by simply guessing the 9-digit meeting ID. You can use one password for all class meetings. Be sure to ask students not to share meeting information outside of the class.
- Enable join before host: Unchecked
- Mute participants upon entry: Selected
- Enable waiting room: Unchecked
- Only authenticated users can join Check Only authenticated users can join to secure your Zoom meeting further if your class does not have external speakers or participants. This option ensures that only users with UChicago Zoom accounts can attend your class. (Note: It does not prevent UChicago students who are not registered for a class from joining unless you have a meeting password enabled.) Students who have not claimed a student Zoom account will have one automatically created when they are required to authenticate into Zoom meeting for the first time.
- Record the Meeting Automatically: Selected; Choose In the cloud
- Alternative Hosts: Add the UChicago email addresses for any co-teaching faculty, TAs or staff whom you wish to be able to host your class meetings in your stead. They must have a Zoom account in the same Zoom sub-account as you (e.g. main UChicago, Chicago Booth, UChicago Medicine, etc.).
- Click the blue Save button at the bottom to create the meetings.
What are the recommended settings for office hours?
Recommended settings for Zoom Office Hours (see additional security recommendations):
- Topic: Appended the words “office hours” to the name of your course. If you teach in a course with multiple sections, include your name for easy identification by the students.
- When: Select a date and time for your first office hours.
- Duration: Set the duration of your office hours.
- Time Zone: Leave as Central Time (Default)
- Recurring Meeting: Select the Recurring meeting checkbox and set recurring frequency to No Fixed Time. This will create one reusable link for the entire quarter.
- Registration: Leave unchecked.
- Video: Off for both Host and Participant.
- Audio: Both.
- Meeting Options:
- Require meeting password: Checked by default, this is to secure your office hours meetings with an automatically generated 6-digit numeric password. If you previously had set up your meetings and communicated the meeting password, then it is fine to keep your original settings. If you are scheduling new meetings, or editing meetings previously scheduled without a password, it is recommended that you enter a strong password (make your password 10 characters long and use at least three of the following types of characters: lowercase letters, uppercase letters, numbers, symbols) in lieu of the generated numeric password. By default, the meeting password is embedded in the meeting link and it is meant to prevent “bad actors” from gaining access to a meeting by simply guessing the 9-digit meeting ID. You can use one password for all office hours meetings. Be sure to ask students not to share meeting information outside of the class.
- Enable join before host: Unchecked
- Mute participants upon entry: Selected
- Enable waiting room: Checked. This will allow you to admit students as you are ready for them, akin to the function of the door in your physical office. We recommend you use Canvas Scheduler or other methods to allow students to set up a time with you so that they won’t be waiting in the Zoom waiting room for a long time.
- Only authenticated users can join: Check Only authenticated users can join to secure your Zoom meeting further if your class does not have external speakers or participants. This option ensures that only users with UChicago Zoom accounts can attend your office hours. (Note: It does not prevent UChicago students who are not registered for a class from joining unless you have a meeting password enabled.) Students who have not claimed a student Zoom account will have one automatically created when they are required to authenticate into Zoom meeting for the first time.
- Record the Meeting Automatically: Unchecked
- Alternative Hosts: Leave empty (unless you are trading-off office hours with another co-teacher)
- Click the blue Save button at the bottom to create the meetings.
If you want to use the same office hours link for more than one Canvas course, you should go to your web portal to set up the office hours using the same settings above, then provide the link and the time you plan to be there to your students–for example, on the Syllabus page of each of your Canvas courses.
Teaching with Zoom
How do I start Zoom class meetings from Canvas?
Instructors should navigate to the Zoom page (use the Zoom navigation item) in the Canvas course. Under the “Upcoming Meetings” tab, there will be a “Start” Button for upcoming meetings. Click this button to launch Zoom and the class meeting. Students registered for a course will receive a message in their Canvas Inbox with the Zoom link when meetings are scheduled. Students may also navigate to their Canvas course site, click on the Zoom navigation item, and see a “Join” button for each of their class meetings under the “Upcoming Meetings” tab.
Can TAs set up my Zoom class meetings for me?
Many TAs have already been provisioned with student Zoom accounts in the same sub-account as the instructor they are assisting. TAs who are not instructors of record, and have not been requested to be added to one of the non-student UChicago sub-accounts, cannot use the Zoom-Canvas integration. To request that a TA be added to the main UChicago Zoom sub-account (or other relevant unit sub-account), please speak to your Dean of Students office.
If your TA’s Zoom account has been moved into your same Zoom sub-account, you may want to grant them scheduling privileges on your Zoom account to allow them to manage your course meetings. Alternatively, you could add them as co-hosts or alternate hosts on your class Zoom meetings, to allow them to assist in running the Zoom meeting.
What are the differences between host, cohost, and alternative host?
The host is the person who “owns” a Zoom meeting; usually it is the person who set it up. The host controls various aspects of the Zoom Meeting, such as managing the participants.
An alternative host is a designated user on the same account who can start the meeting if you are unable to. Alternative hosts are assigned when a meeting is being set up, and they have the same control over aspects of Zoom Meetings as the host.
A co-host is assigned during a meeting. Co-hosts can manage the administrative side of the meeting, such as managing participants or starting/stopping the recording. A co-host can be anyone who has joined the meeting. There is no limitation on the number of co-hosts you can have in a meeting or webinar. Note: if you are asking students to moderate chat questions, you do not need to assign them as co-hosts.
| Host | Alternative Host | Co-Host | |
|---|---|---|---|
| Roles created | When someone creates a Zoom meeting | Assigned during the creation of a Zoom meeting by the host. | Assigned after a participant has joined the meeting. |
| Privileges | Control over all aspects of a meeting. | Control over all aspects of a meeting. |
Co-host can manage participants or start/stop the recording. Co-host cannot.
|
For more information, see:
What are the tools within Zoom that enable me to interact and engage with students?
Zoom has very limited polling questions (multiple choice and multiple select) -- does Poll Everywhere or other classroom response systems work in Zoom?
Yes, you can use Poll Everywhere as if you are presenting in the classroom.
How many participants can I have in a Zoom meeting? And how many in breakout rooms?
Instructors of record in Spring quarter 2020 with a Pro account can host meetings with up to 500 participants. With Pro accounts, up to 50 breakout rooms can be created, and there can be a maximum of 200 total participants across all breakout rooms. Breakout room participants have full audio, video, and screen share capabilities. For more about breakout rooms, see Getting Started with Breakout Rooms.
For more information, see:
I don’t see breakout rooms as an option, how do I enable it?
If you don’t see breakout room as an option in a meeting that you are a host, you will need to enable it in the web portal
- Sign in to the Zoom web portal.
- Click on Settings.
- Navigate to the Breakout Room option on the Meeting tab and verify that the setting is enabled. If the setting is disabled, click the toggle to enable it. If a verification dialog displays, choose Turn On to verify the change.
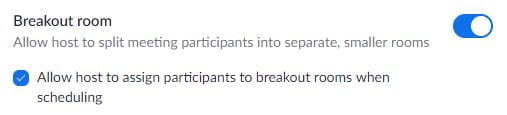
- (Optional) Click the checkbox to allow meeting hosts to pre-assign participants to breakout rooms.
Can I download a list of students who attended the synchronous meetings?
- Go to the appropriate web portal for your Zoom account and log in with your CNetID and password.
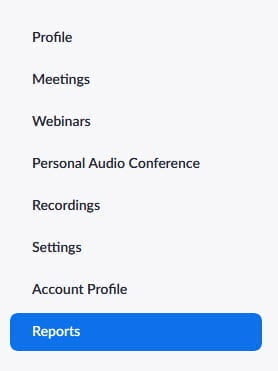
- Select Reports on the left navigation.
- Select Usage.

- Change the date to include the date of your meeting and click Search to find it.
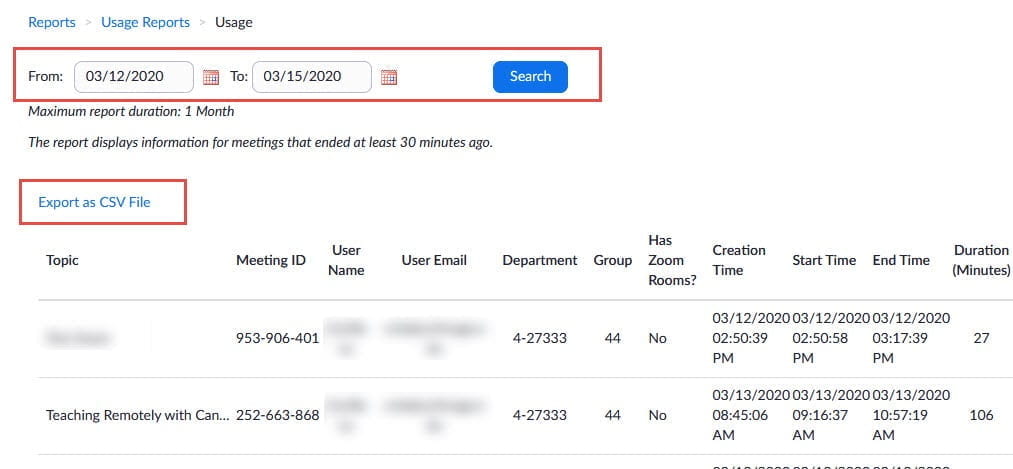
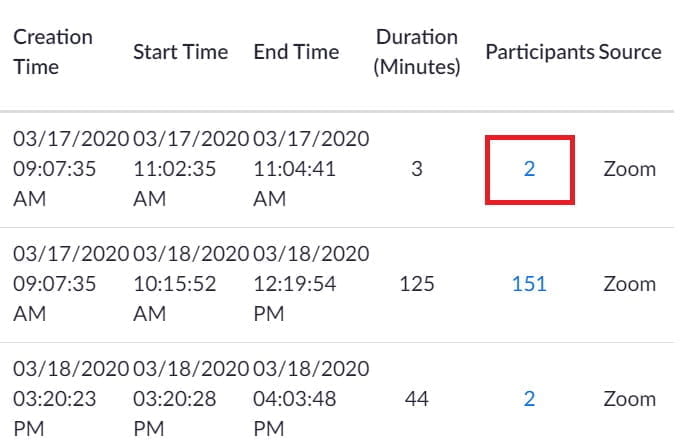
- Scroll to the right and click on Number of participants.
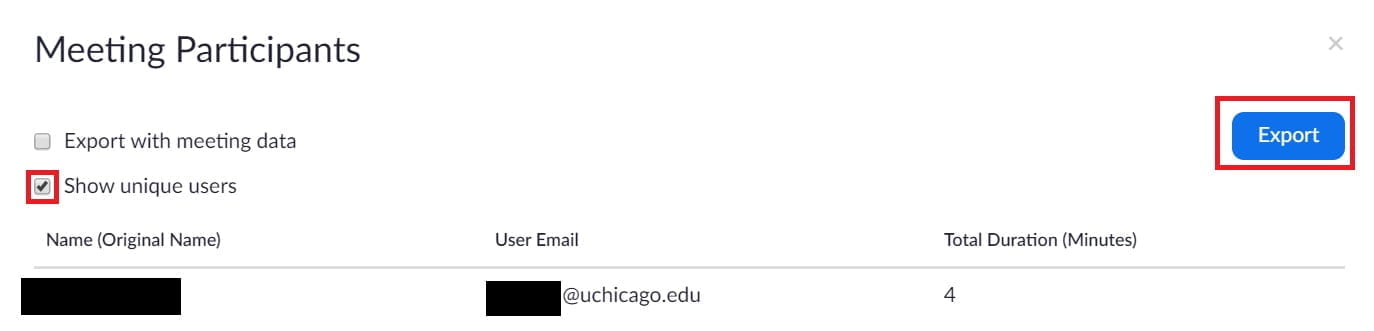
- Check the Show unique users box and click Export.
What do I do if my class or meeting is disrupted?
For additional information about Zoom Disruptions, please consider the key steps outlined below.
- Mute: Mute All to stop disruptive audio.
- Identify: Identify the uninvited participant.
- Remove: Remove the disrupter by selecting ‘remove participant’. Then ‘Lock Meeting’ to prevent others from joining the meeting in progress.
- Report: When the meeting is over, report the disruption to IT security with as much detail as possible.
Where can I download UChicago Zoom backgrounds?
Please feel free to download these free UChicago virtual backgrounds to display during a Zoom meeting. Learn how to add these custom images as Zoom backgrounds.
Zoom Recordings
Where do I find the Zoom meeting recording I saved on my local computer?
The easiest way to find your local recordings is to download the Zoom desktop client and click Meetings > Recorded on the left, then Open.
Who can record a meeting?
If a meeting is set to Local Recording (on the computer), then by default only the host can record. Participants can request to record the meeting; the host will receive a notification when they make that request and can approve or deny it.
If a meeting is set to Cloud Recording, you can record a meeting without the host by setting up automatic recording and enabling Join before Host. NB: Cloud recording is not enabled for students, except those serving as instructors. TAs may record sessions locally with their UChicago Student Zoom accounts, and they may upload the recordings to Panopto or Canvas.
For more information, see:
Other Remote Tools
How can I find information about Panopto and how best to use it for remote teaching?
Panopto is the University’s video management platform. It is a tool for recording, organizing, embedding, and live streaming video. For more information on its features and functionality, visit UChicago’s Panopto site. Additional tutorials and documentation can be found on Panopto’s website; see the Panopto Getting Started guides or their video tutorials. You can create your Panopto account by logging into Panopto with your CNetID and password.
For individual support on setting up your remote teaching via Panopto, please complete this brief Contact Us form.
Can I evaluate learning and progress (such as giving quizzes or exams) using Canvas or Zoom? What is Gradescope and how can I use it?
You can find helpful resources to prepare you for remote teaching at Course Set-Up for Teaching Remotely. Also, the Chicago Center for Teaching has provided the Pedagogical Guidance for Remote Teaching (PDF). Additional resources may be available through your units. IT Services has a useful guide for using online quizzes and surveys in Canvas (PDF). Additional Canvas resources are also available.
Gradescope is a tool that facilitates the grading of hand-written work, such as assignments or exams involving formulas, in an easier, more efficient, and more consistent way; it also integrates with Canvas. See Gradescope information and links on IT Services’ Academic Technology Teaching Tools page.